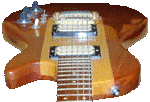
My Westbury Standard guitar had obviously had lots of heavy use by it's previous
owner. The frets were in an awful state. I could not get it to stay in tune and
setting intonation was impossible. It had been nearly 25 years since I last
fretted a guitar, but I thought this one was worth the effort. I was right.
|
|
|
|

|
|
|
|
The Damage |
|
Look at the grooves in those top frets. No wonder the intonation is awfull |
|
|
|
|
|
|

|
|
|
|
Off with the old |
|
The old frets were removed by heating with a big soldering iron, then carefully pullin gout with a pair of end cutters |
|
|
|
|
|
|

|
|
|
|
Clean up the slots. |
|
The fret slots look a mess here, but it only took a light sanding of the board and running a scalpel in the slots to clean tehm up nicely. |
|
|
|
|
|
|
|

|
|
|
|
On with the new |
|
The new fret wire has been cut to a couple of mm over length and bent to radius before beeing firmly hammered home |
|
|
|
|
|
|

|
|
|
|
Masking up |
|
Before the frets can be filed to length the surronding bodywork is masked off. |
|
|
|
|
|
|

|
|
|
|
Ready to play. |
|
With the ends of the frets nicely profiled and rubbed smooth the guitar is playable |
|
|
|
|
|
|
|

|
|
|
|
No more Grooves. |
|
Compare this with the first photograph. Deep frets with no grooves. |
|
|
|
|
|
|

|
|
|
|
Close up of the dusty end |
|
As it turned out the frets did not need to be levelled with a stone. I was able to get a nice low action anyway. |
|
|
|
|
|
|

|
|
|
|
All done. |
|
I was able to easily tune and set the intonation. it stays in tune as well! |
|
|
|
|
|
|
|
 Wired Wood
Guitars